Runtime Tile Demo
Sample scene showing how to create a city builder based on tiles.
Installation
Add the RUNTIME_ROAD scripting define to the Player Settings of the project.

Open the RuntimeTileRoad Demo to get started.
Tile Prefab
How To Create
Open your prefab with your tile.
Create initial Road segment in the Prefab stage.

Adjust segment type, number of lanes, lane width and rotation to suit your tile.

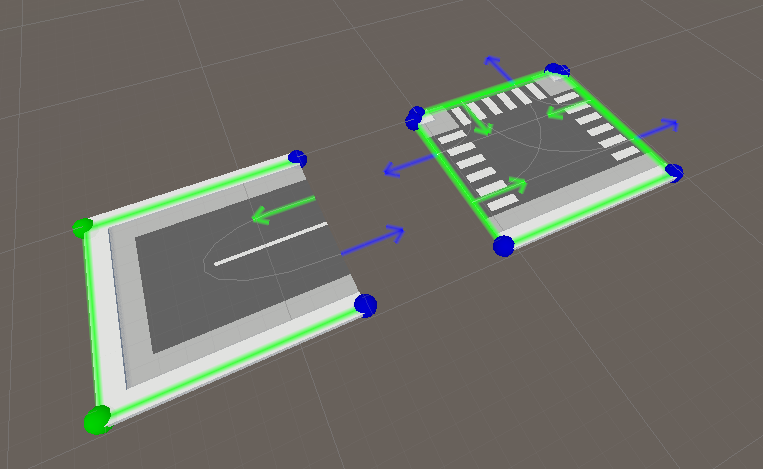
Traffic nodes & Pedestrian nodes entrances/exits should overlap at the same position for all segments so that they can connect to other tiles at those positions.
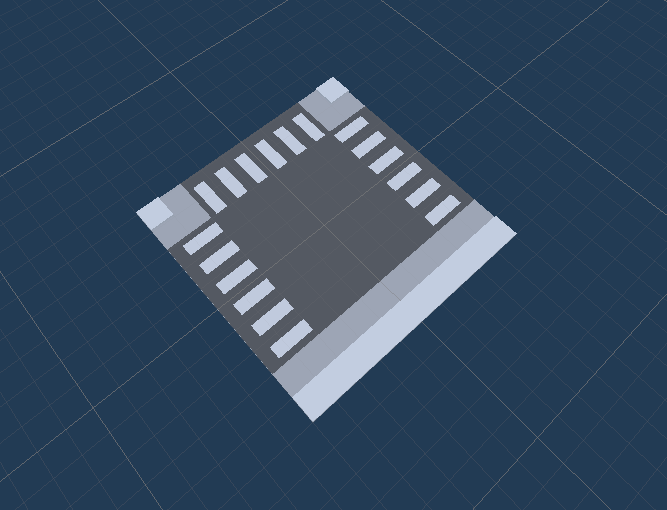
Source tiles example.

Example of overlap between traffic nodes and pedestrian nodes (Traffic node arrows & blue pedestrian node should overlap perfectly)
Add a RuntimeSegment component to the parent of the tile.
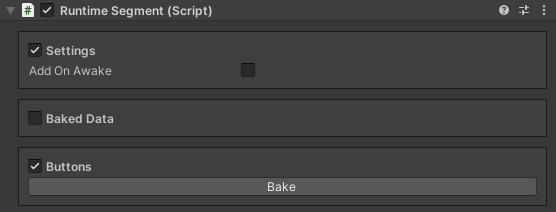
If you have made further changes to the road segment, press Bake in the RuntimeSegment to bake the data.
The next steps are optional if you are using your own placement solution.
Add a RuntimeRoadTile component to the parent of the tile.
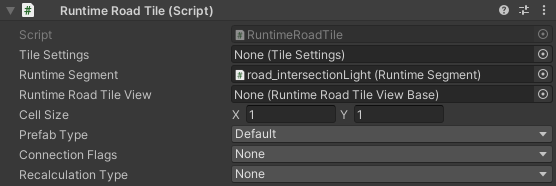
Assign a Tile Settings to the RuntimeRoadTile.
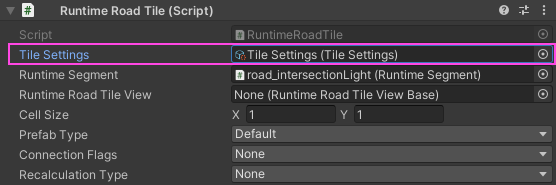
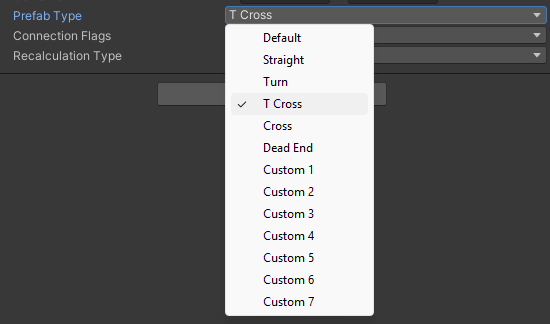
Select Prefab type according to the shape of the tile (custom types for custom shapes).
Select the direction of the connections if you want to use automatic tile replacement (currently only works for 1x1 tiles).

Connection example (circles on scene show direction)
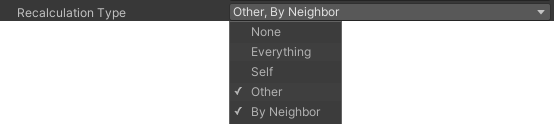
Select Recalculation type, if you want to use automatic tile replacement.
Add a RuntimeRoadTileView component & assign it to the RuntimeRoadTile.
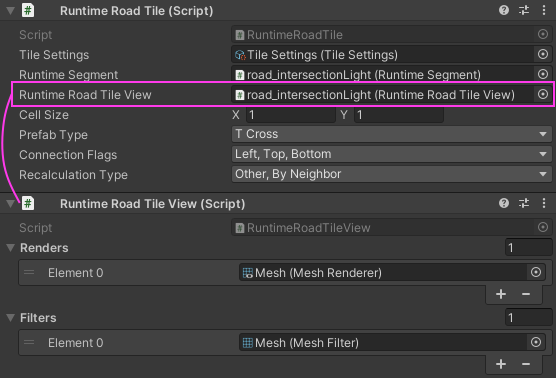
The next step is to assign it to a Tile preset according to its Prefab type.
Preview Icon
To create a Preview icon for the Prefab tile, follow these steps:
Select from
Spirit604/CityEditor/Window/Prefab Preview Saverthe toolbar context menu.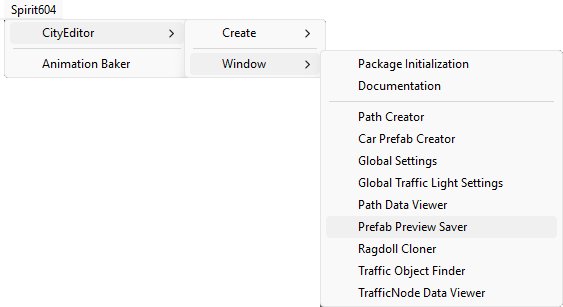
Drag & drop create tile prefabs into the list field.
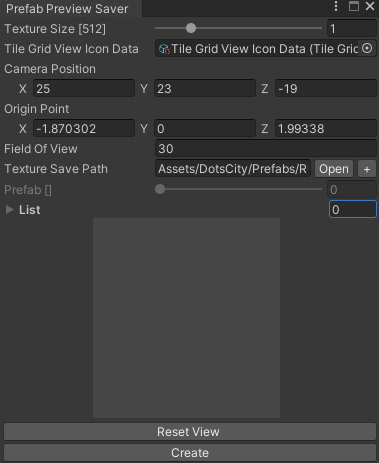
Adjust the camera position to adjust the Preview icon.
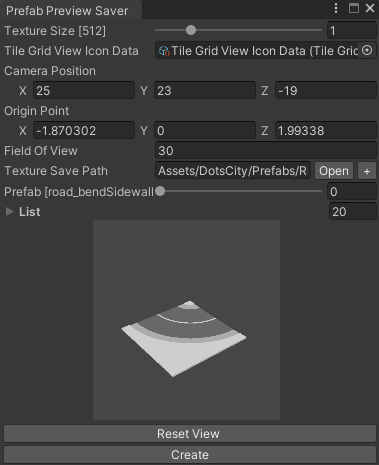
Press Create Button.
How To Place
If you are using your own placement logic, use this sample code:
[SerializeField] private RuntimeSegment runtimeSegmentPrefab;

private void Place(Vector3 position, Quaternion rotation)
{
        var runtimeSegment = Instantiate(runtimeSegmentPrefab, position, rotation);
        runtimeSegment.PlaceSegment();
}
Make sure RuntimeRoadManager is on the scene.
Tile Settings
Contain settings for the size of a single cell.
How To Create
Select from
Spirit604/RuntimeDemo/Tile Settingsthe project context.
Where Is Used
RuntimeRoadTile.
GridBoundsBase.
TileGrid.
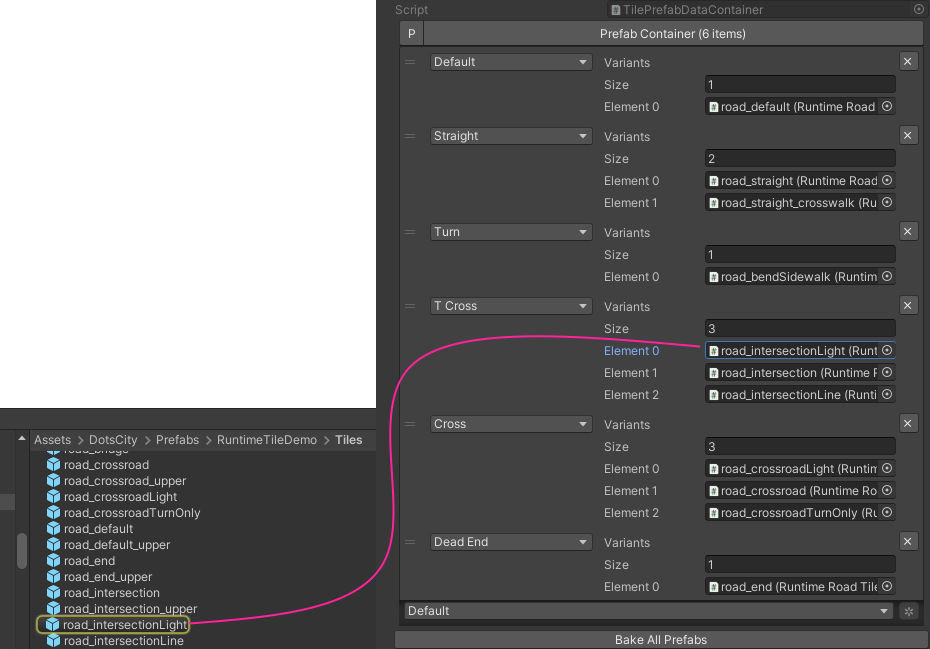
Tile Preset
How To Create
Select from
Spirit604/RuntimeDemo/Tile Prefab Data Containerthe project context.
How To Assign
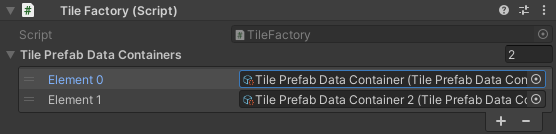
Select TileFactory in the scene.
Assign preset to the TileFactory.
Structure

Camera : sample camera of Tile demo [optional].
TileGameUI : sample UI manager of the scene, used by TileGameManager. [optional, can be replaced by an implementation of `TileGameUIBase`].
CullPoint : Cull point of the scene [required].
CameraFollowObject : follow & aim point of the Camera, controlled by CameraMover [optional].
CameraMover : controls the movement of the aim point of the Camera [optional].
MapBounds : limits of the movement of the CameraFollowObject, used by CameraMover [optional].
Input : user input of the tile game, used by TileGameManager [optional, can be replaced by an implementation of `TileGameInputBase`].
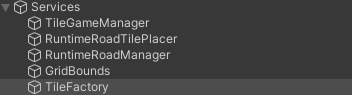
TileGameManager : main sample tile manager, which controls all sample placement logic [required, if you are using RuntimeTileRoad demo scripts].
- RuntimeRoadTilePlacermanager which responsible for tile layout on the scene [required, only if you are using RuntimeTileRoad demo scripts].
TileGrid : map of tiles added to the scene. [optional, can be replaced by an implementation of `TileGridBase`].
GridSceneView : grid display on the scene [optional, can be replaced by an implementation of `GridSceneViewBase`].
PreviewService : display a preview of an object on the scene before it is created [optional, can be replaced by an implementation of `PreviewServiceBase`].
RuntimeRoadManager : manager that converts RuntimeSegment road into an entity road graph. [required].
GridBounds : limit of the map of cells available for the tile prefabs, used by RuntimeRoadTilePlacer [optional, can be replaced by an implementation of `GridBoundsBase`].
TileFactory : factory containing all the Tile presets, used by TileGameManager [optional, can be replaced by an implementation of `TileFactoryBase`].
Tiles : tile parent of the tiles, used by RuntimeRoadTilePlacer [optional].
Plane : plane of the scene [optional].