Pedestrian Node
How To Create
- There are 2 ways:
Create node by yourself in the Unity toolbar:
Spirit604/Create/PedestrianNode

Create node with PedestrianNodeCreator tool.
How To Connect
- There are 2 ways:
Select a node in the hierarchy or on the scene and press
Tabover the node you want to connect to.Use the PedestrianNodeCreator tool : select the initial node by pressing
Wabove it and connect it to another node by pressingE.
Note
Hotkeys can be modified in the PedestrianNodeHotkeyConfig asset.
Pedestrian Node
Pedestrian node is a node for creating pedestrian route.

Connection Data
Directions of auto-connections
Direction of raycasts to connect with other nodes (can be useful for generating squared scenes).

Custom Node Settings
Default
Default node for the route.
Sit
Node for benches, seats, etc (test scene).

Note
Required PedestrianNodeSeatSettings component.

Bench example.
House
Node for entry/exit to the house (test scene).
Tip
Enable Can spawn in view in the pedestrian node settings to simulate leaving from the house.
Pedestrians who have entered the house node are will be destroyed.
Idle
Node for temporary idling pedestrians (test scene).
Note
To set a custom idle time at the node, add the PedestrianNodeIdleSettings component.

Car parking
Node to enter/exit a parked car (generated by ParkingBuilder). Read more about parking states.

Parking node example.
Talk area
Node for crowd conversations of pedestrians (test scene).
- Area shape type: type of area shape.
Square
Circle

Talk area example.
Traffic public stop station
Node for waiting for public transport.
Note
To set the maximum number of waiting vehicle passengers, adjust the capacity parameter.

Stop station example.
Traffic public entry
Node for entering public transport.

Public entry example (white box).
Warning
Entry node should be any GameObject with the component VehicleEntryAuthoring which adds a node with Traffic public entry type.
Trigger
Node to notify the user that the entity has reached the node.
How to use:
Activate TriggerNodeConfig & sync with the subscene.

If you need to subscribe to this reach event, use Traffic Node Service.
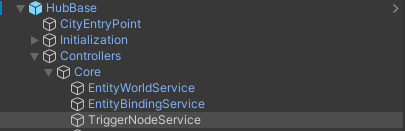
If you need to associate a scene object with the trigger event, follow these steps:
Activate EntityBindingConfig & sync with the subscene.

Create a new game object in the scene where the trigger is expected (e.g. cube).

Add TriggerNodeHybridListener component.

Press + button & set Binding type to Pedestrian node in the inspector.

Press + on the scene node to which you want to associate the current scene object with the entity.
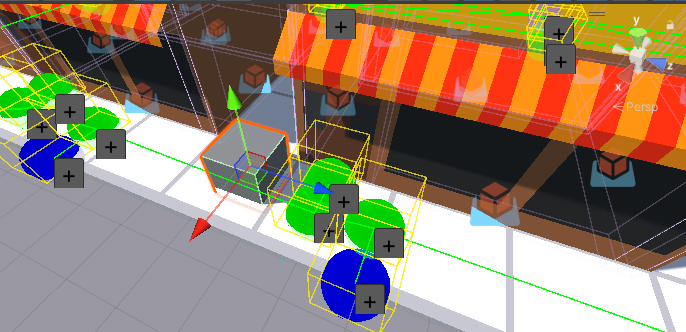
Source scene example.

Selected node example.
Now you can listen to entities arriving on this node by subscribing to
TriggerNodeHybridListener.OnTriggerEnterwith code in the TriggerNodeHybridListener component or by using UnityEvent in the inspector of this component.
Trigger And Destroy
Node to notify the user that the entity has reached the node & then destroy the entity. Use case is the same as the Trigger type.
Common Settings
- Shape typeshape of the area for randomization of pedestrian targets.
Circle
Square
Rectangle
Hotkeys

CullState Info
States
Culled : entity not available for spawning.
CloseToCamera : entity available for spawn.
InVisionOfCamera : entity available for spawn only during the initial scene start (unless the Can spawn in view option is enabled).
Pedestrian Node Creator
Pedestrian Node Creator is a tool to quickly create and connect pedestrian nodes.
How To Create
Select in the Unity toolbar:
Spirit604/Create/PedestrianNodeCreator

How To
Create Node
Press the Tab button on the keyboard to create preview PedestrianNode.
Place the preview PedestrianNode at the desired position.
If you need to attach the PedestrianNode to a custom shape surface, enable Auto Attach To Surface in the Inspector.
Press E button on the keyboard to create the final PedestrianNode.
Tip
You can change the hotkeys to your taste.
Select Node
Choose Selection mode.
Click W above the node to select PedestrianNode.
Connect Node
Click E over the target PedestrianNode to connect (Single selection mode only).
Locate Node
Choose Selection mode.
Drag the position handle to the desired position.
Settings
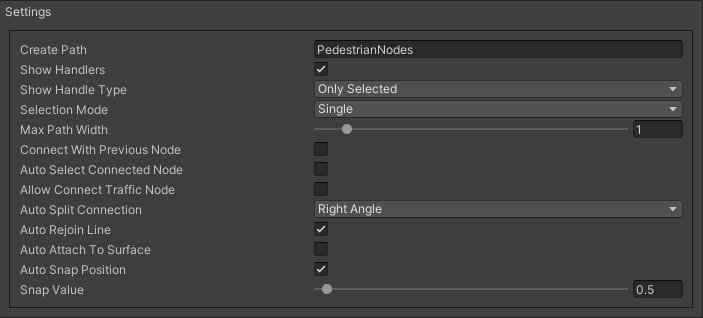
- Show handle type:
Only created : only the created nodes will have handles shown
Only selected : only the selected nodes will have handles shown.
All : all nodes will have handles shown
- Selection mode:
Single : only 1 node is selected.
- Multiplemultiple nodes can be selected.
- Multiple handle type:
Single : node has a position handle each individually.
All : all nodes have the same position handle.
Unselect selected : if you try to select an already selected node, it will be unselected.
- Auto split connectionif a node is located between a connection of existing nodes, the connection will be reconnected between them (made with a Raycast).
Disabled
Right angle : 90° angle.
Custom angle : user custom angle.
- Auto attach to surfaceauto attach created node to surface.
Surface mask : layer mask to attach.
- Attach type:
Collider : attach to collider.
Mesh : attach to mesh.
- Auto snap positionauto snap node position during creation.
Snap value : snapping value.
Scene Settings

- Show path type:
All : all the nodes will be shown.
Only created : only the nodes created by the creator will be shown.
- Show node buttonson/off display custom buttons of selected nodes.
- Node button type:
Delete : node will be deleted by clicking.
Unselect node will be unselected by clicking.
- Show border routes :
Current : route will be displayed with the assigned width of the nodes.
Selected : route will be displayed with the selected route width in the creator settings.
Buttons
Hotkeys
Advanced Connection Window
Help window for advanced node connection settings.
Split Connection
Split the existing connection into several nodes.
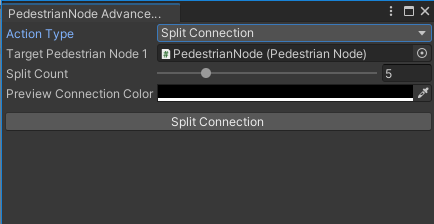

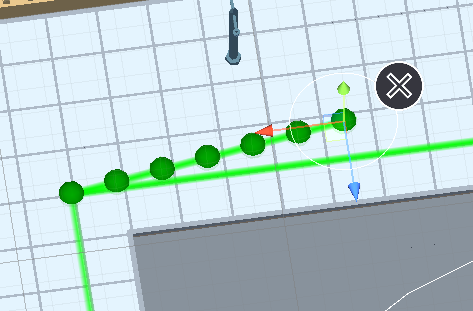
Split connection example.
Note
Split is available for already connected nodes only.
Join To Connection
Connect the selected node to an existing connection.


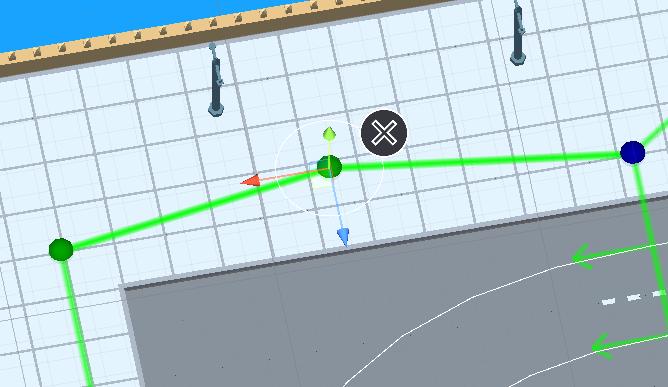
Join to connection example 1.


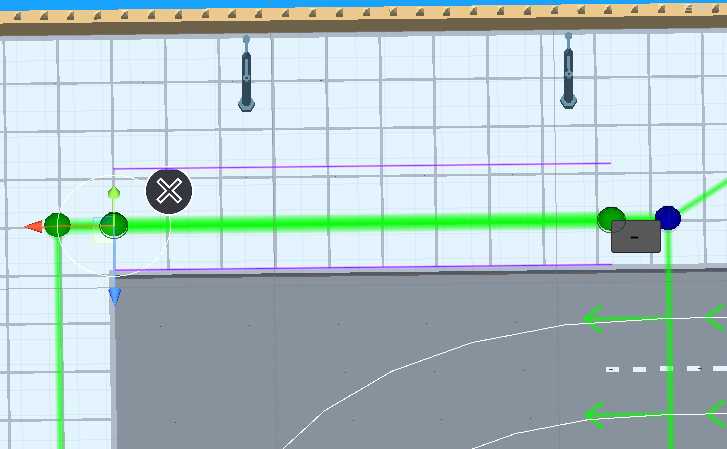
Join to connection example 2 (attach to line enabled).
Create Custom Route Width
Create a custom route with custom width between two nodes.


Create custom route width example.
Change Current Route Width
Set the custom width to the two selected nodes.
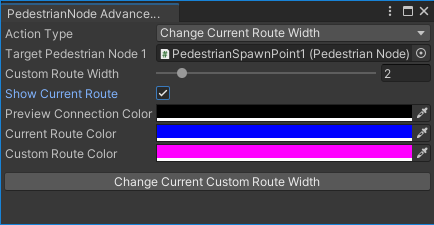


Change current route width example.