Quick Start
Initial Components
Create a new scene.
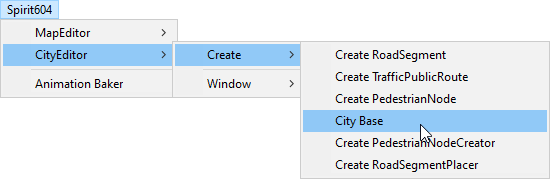
In the Unity toolbar open:
Spirit604/CityEditor/Create/City Base
This window appears for the first time:
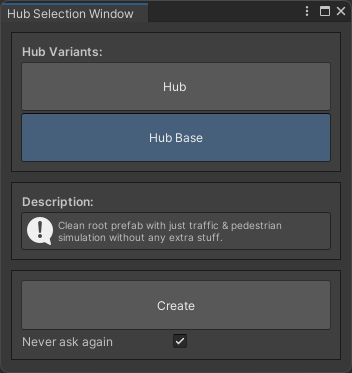
Select Hub or Hub Base according to your needs (in most cases Hub Base will be suitable for you if you don’t need sample scripts (built-in player, UI, camera, etc))
- Description:
Hub : root prefab used in Demo & Demo Mono scenes & contains demo sample dependencies.
Hub Base : clean root prefab with just traffic & pedestrian simulation without any extra stuff (player should be spawned with your own script or simply drag & drop into the scene).
Depending on the desired simulation, select the World simulation type: DOTS or Hybrid Mono.
Note
DOTS : simulation of traffic & pedestrians entirely in DOTS space.
Hybrid mono : physics simulation run on Monobehaviour scripts, but input taken from DOTS entities simulation.
Select Traffic entity type & Pedestrian entity type according to your needs (for the Hybrid Mono simulation, only the Hybrid Mono physics is available for traffic).
Press Create button.
Continue with the Hub Base or Hub article, depending on your choice.
Hub Base
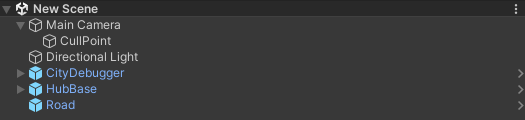
Initial scene example:
By default, the Cull point is automatically generated as a child of the main camera.
If you want to add your own player that interacts with traffic, read here [optional step].
The next step is to configure Scene
Scene
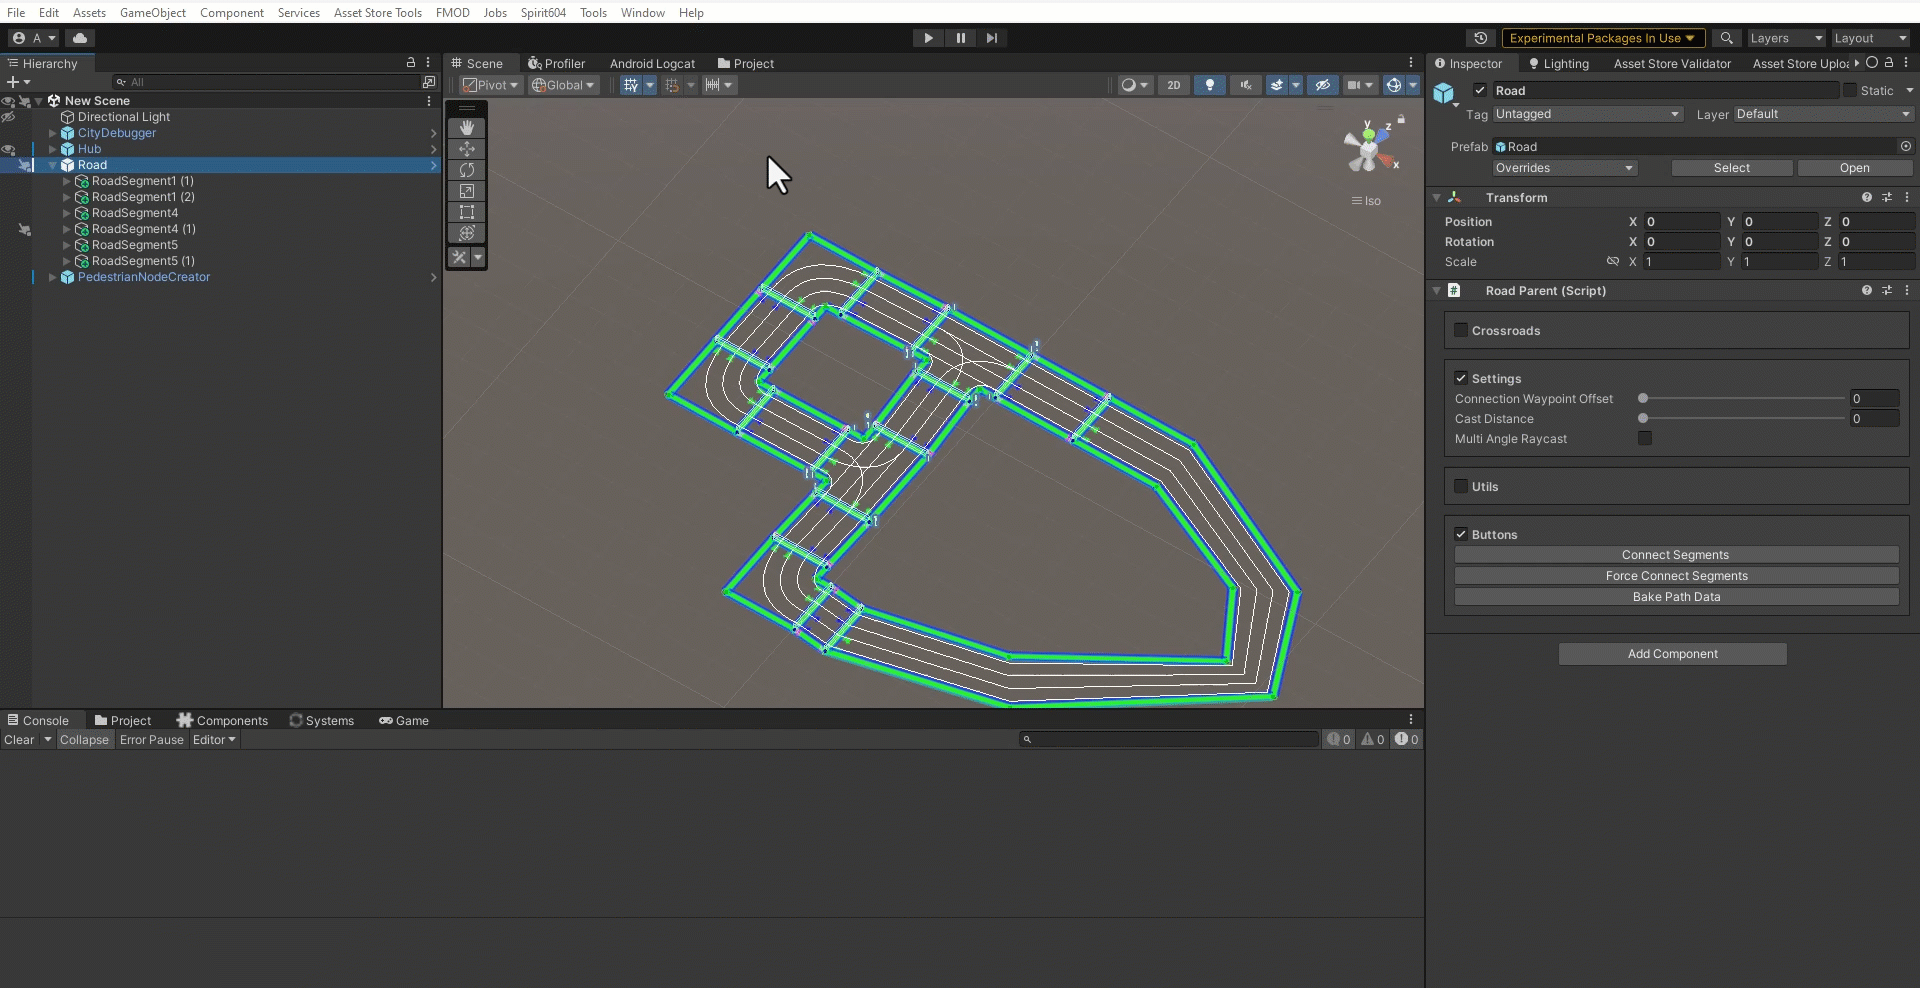
Add Road segments to the scene (Use Ctrl+D to duplicate and Caps Lock to rotate).
In the Road Parent press Force connect segments button.
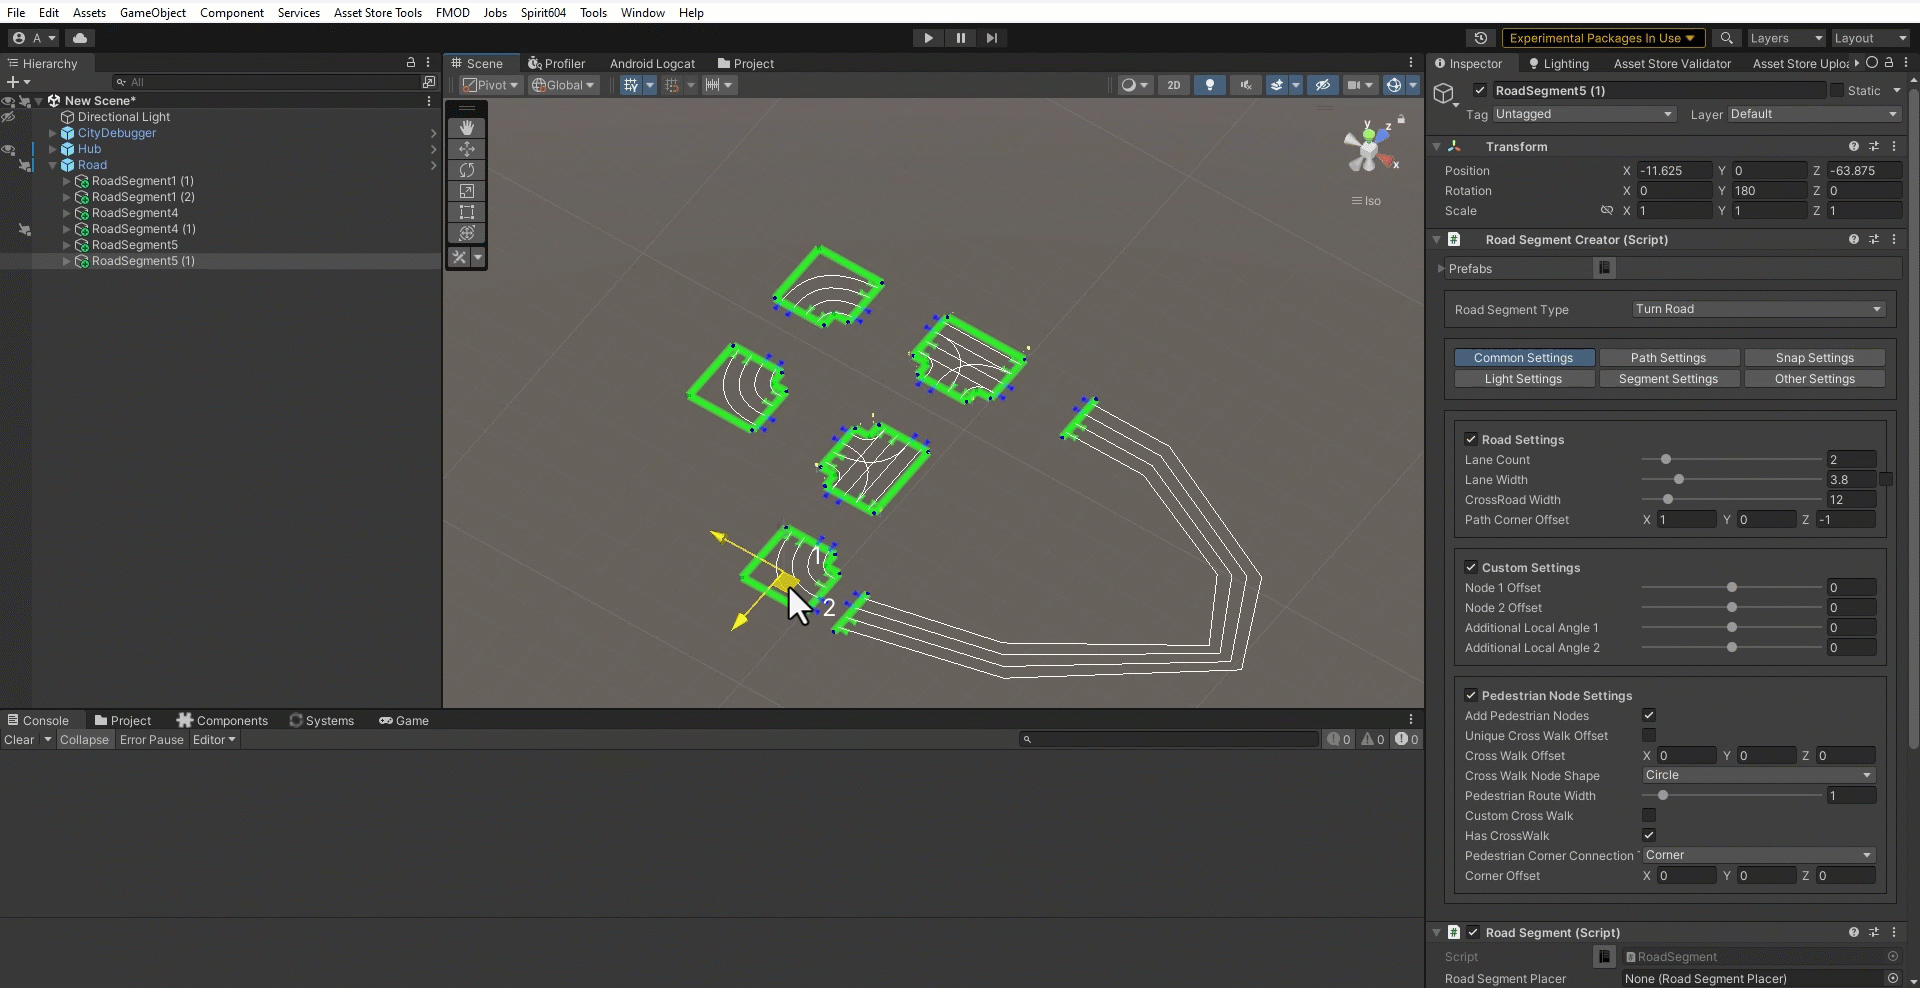
Create & connect Pedestrian nodes using the Pedestrian Node Creator (W hotkey to select node, E hotkey to connect nodes) or tick on Connect crosswalk option in the Road Parent & press Force connect segments button again (Use Tab and E hotkeys to place new nodes)

In the Road Parent press Bake Path Data button (should be done after each road edit & before starting the scene) & select Hub object on the scene & generate a subscene.
For more information on how to create a road, read the Road Network Workflow.
Create a ground, if missing (GlobalSurfaceCollider example prefab) & set the layer for your ground surfaces to Ground (18) & layer for your static objects to StaticPhysicsShape (22) (read more about PhysicsShapeTransfer service, if you are going to use DOTS only). For DOTS cars, the ground surface must be placed inside a subscene, whereas for Mono cars, it should remain in the main scene.
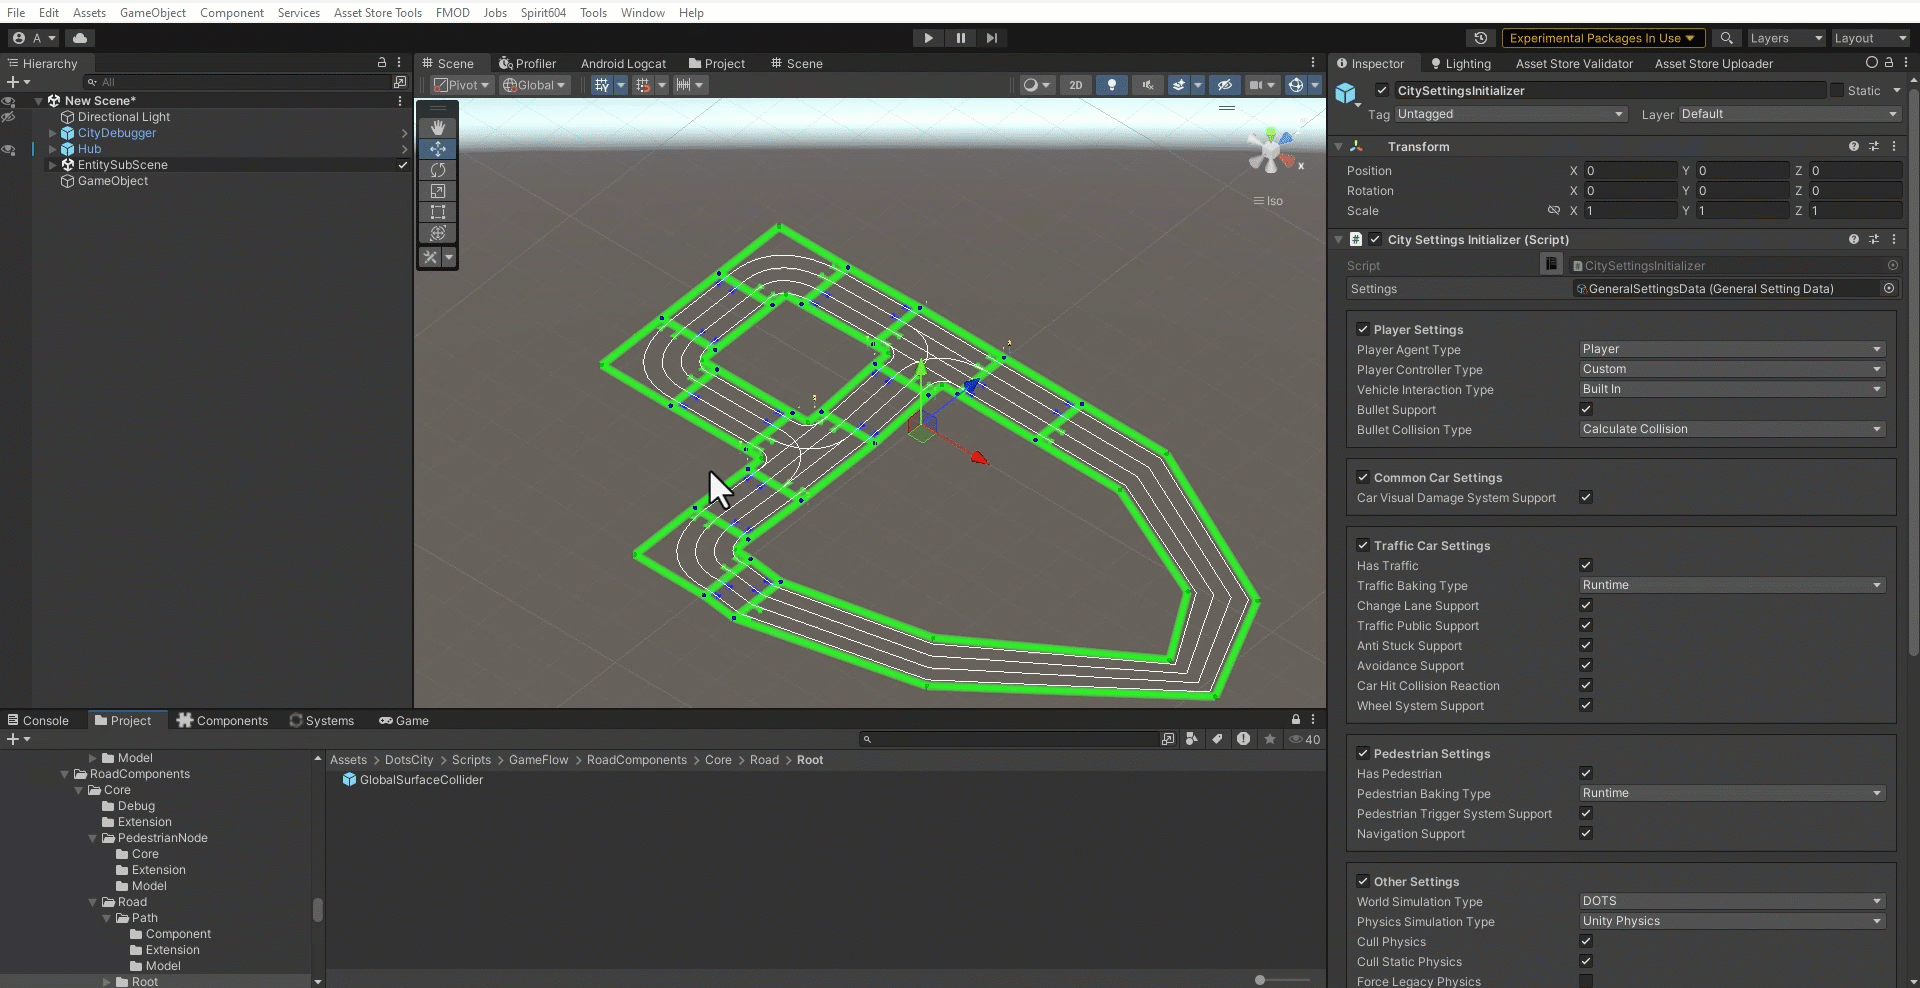
If you plan to use Hybrid Mono vehicles, set the World simulation type to Hybrid mono in the General settings config [optional step].
Create your own traffic vehicles or temporarily use the built-in traffic already added [optional step].
If you have created your own traffic, make sure the raycasting layer matches your ground collider layer (traffic prefabs can be found in TrafficCarEntityPoolBakerRef at the scene).
Create your own pedestrians or temporarily use the built-in pedestrians already added [optional step].
In the Cull config, adjust culling distance at which road objects, traffic, pedestrians etc. will be activated & use Cull debug to view culling states [optional step].
In the Traffic settings, disable Cull physics if you don’t want cars to disable their physics when they’re far away [optional step].
Add & customize game sounds [optional step].
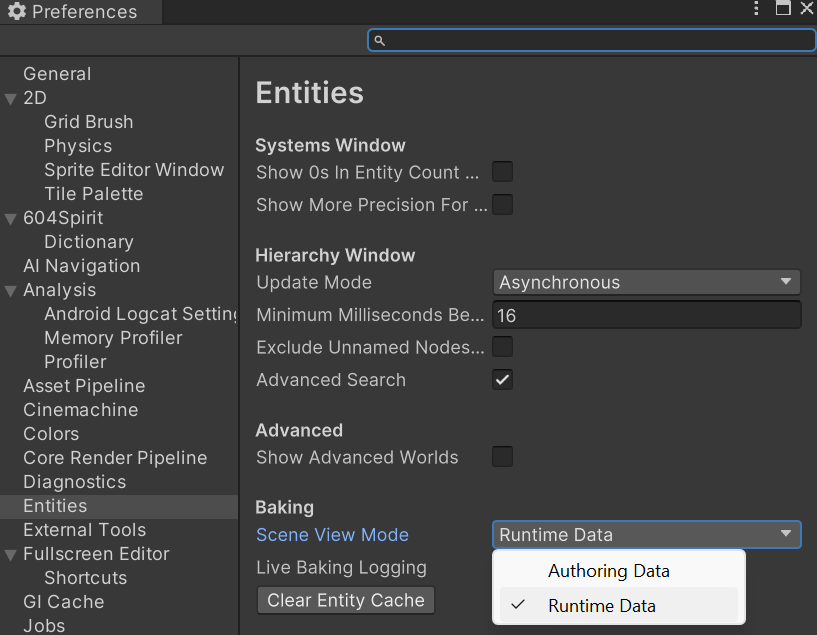
- By default, Unity.Entities is not rendered in the Sceneview, to fix this follow these steps:
In the Unity editor toolbar select:
Edit/PreferencesSelect the Entities tab.
Set Scene view mode to Runtime Data.
Launch the scene.

Result example.
Demo Scene
In the Project Folder view, select the following scene:
DotsCity/Samples/Demo City/Scenes/Demo
Press Play button.
Read more about Project Scenes & Scene Structure.
Demo Mono Scene
In the Project Folder view, select the following scene:
DotsCity/Samples/Demo City/Scenes/Demo Mono
Press Play button.
Read more about Project Scenes & Scene Structure.