Road Segment Creator
Road Segment Creator is a tool for creating and customizing a RoadSegment
How To Use
Create a RoadSegment.
Place the segment at the desired position.
By default, RoadSegment prefab contains RoadSegmentCreator component.
- Select the Road segment type depending on the shape of your intersection.
Standard shape used for the most common shapes (T-cross, X-cross & etc).
Custom segment used for intersection with custom shape.
Custom straight used on straight roads with curves or long straight roads.
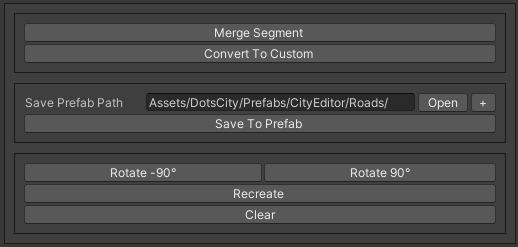
In the other tab, you can convert any Standard shape segment to a Custom segment for more flexibility (also check out the new Auto-Crossroads feature for automatic crossroad generation).
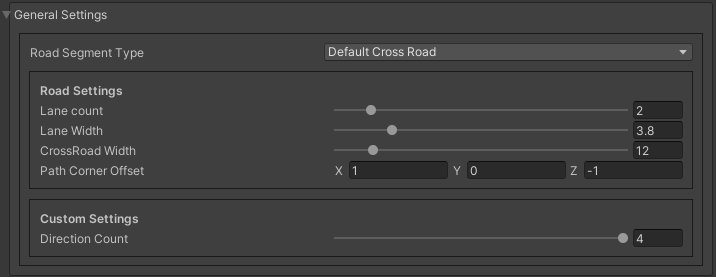
In the general settings, adjust lane count, lane width, crossroad width.
In the custom settings, adjust settings according its type.
In the pedestrian node settings, you can customize pedestrian crosswalks.
In the light settings, you can set offsets of the traffic lights or disable them.
In the path settings, you can enable traffic node handles, adjust speed limit & waypoints of the paths of the created intersection.
Add RoadSegment to the RoadParent as children.
Standard Shapes
Default Crossroad

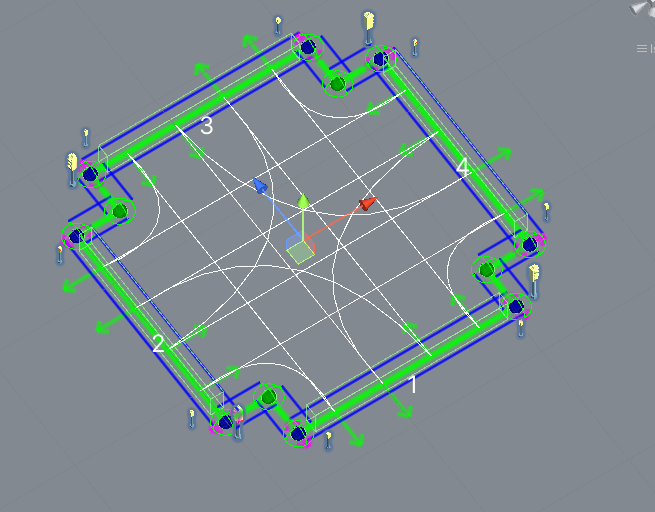
Example.
Turn Road

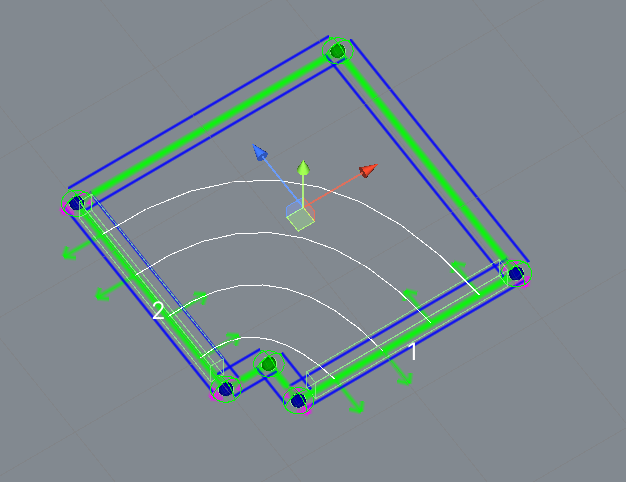
Example.
Straight Road

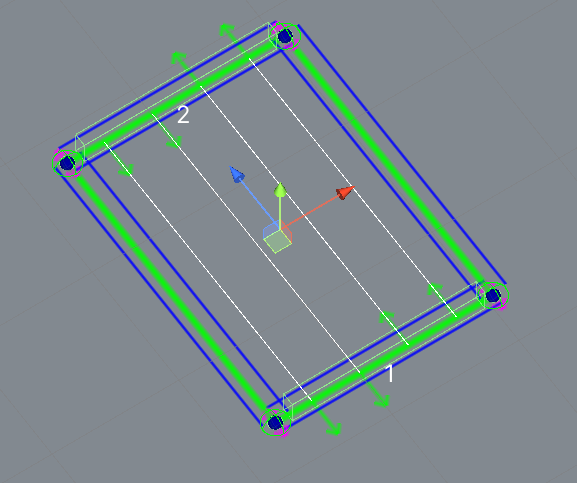
Example.
Merge Crossroad

Example.
Merge Straight Road
Example.
Merge Crossroad To Oneway Road

Example.
Oneway Straight
Example.
Oneway Turn
Example.
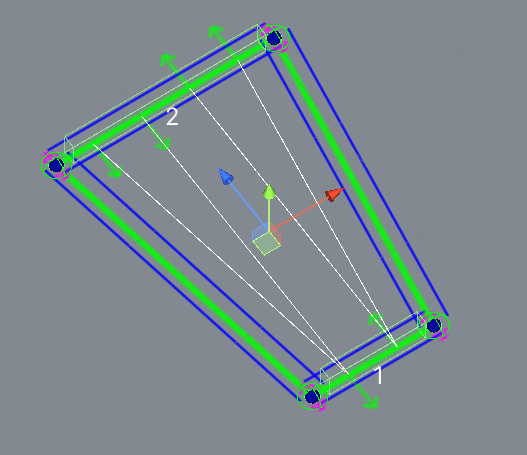
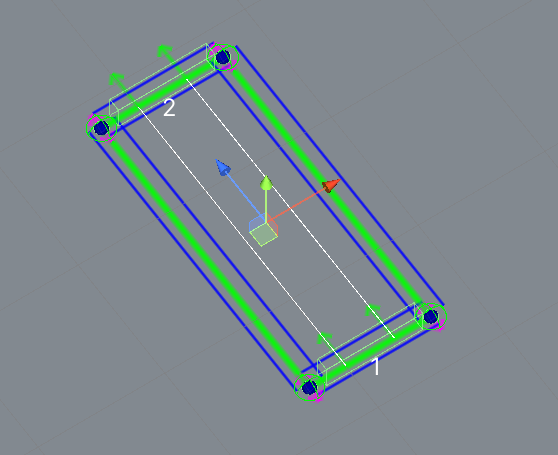
Custom Straight Road
Creator for creating straight roads of any shape.
How To Use
Place the custom straight segment where you want it.
Place the traffic nodes at the start and the end of the path (or expand the road by holding left-shift key and clicking the left-mouse button).
Rotate the TrafficNodes in the direction of the route (make sure that the rotation of the nodes is set correctly).
Adjust the number of lanes and the speed limit of the segment.
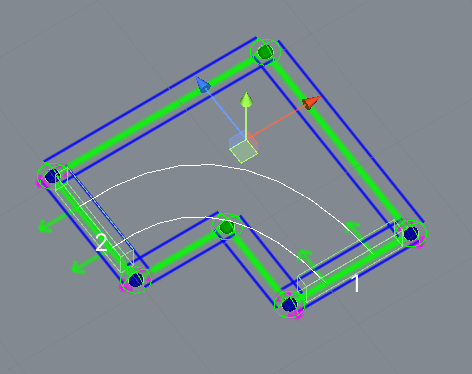
If necessary, add more additional nodes to the paths (by pressing + in the scene) [optional step].
Rotate the nodes of the paths according to the direction of the path [optional step].
Snap TrafficNodes to the surface by pressing the Snap To Surface button if necessary [optional step].
Complete all the default steps.
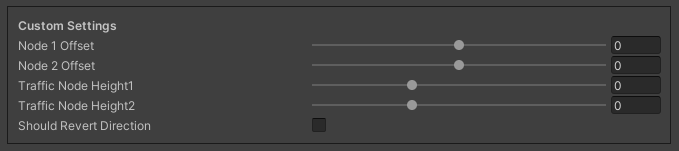
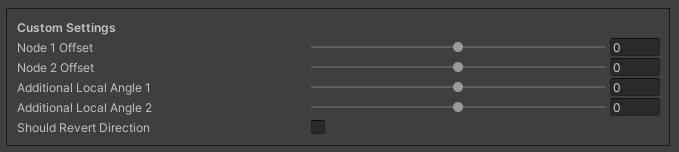
Settings
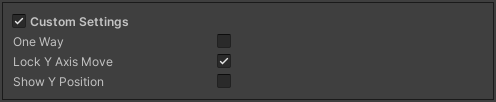
Custom Settings
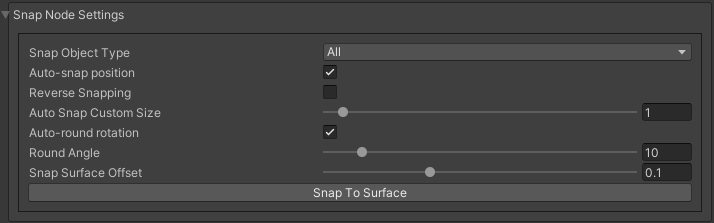
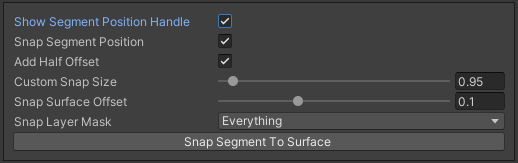
Snap Node Settings
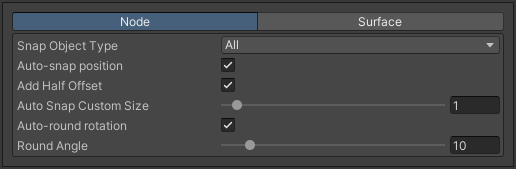
Info.
Snap Surface Settings
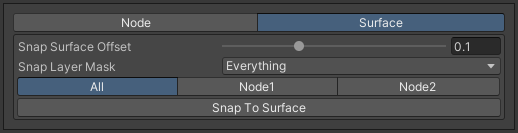
- Node Buttonswhich node you want to snap to.
All
Node1
Node2
- Buttons:
Snap to surface: snap selected nodes to the surface.
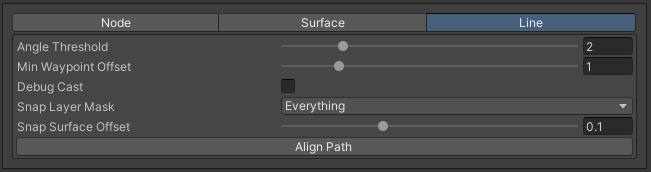
Snap Line Settings
Creates additional path nodes along the curved meshes of the collider to make the path follow the shape of the collider (v 1.0.4+).
Example.
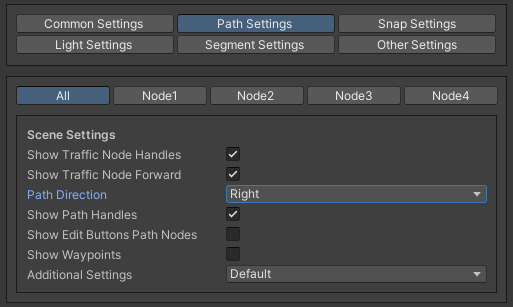
Path Settings

Examples

Source segment example.
Complex shape example.
Surface snapping example.
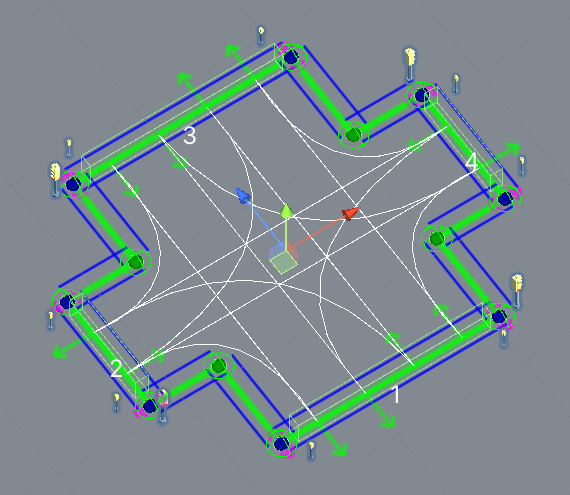
Custom Segment
Creator for creating segments of any shape and complexity.
How To Use
Place the custom segment where you want it.
Choose one of the following methods to create your intersection or layout:
Option A: Manual Connection (Fine-tuning)
Toggle on the Custom settings parameter.
Select the New node settings type and create new TrafficNodes by pressing the Add Traffic Node button.
Place and rotate all created nodes according to your needs (ensure correct node rotation).
Snap TrafficNodes to the surface by pressing the Snap To Surface button if required.
Open the manual PathCreator tool to manually create and link paths between the nodes.
Option B: Auto-Crossroads Mode (From Scratch)
Create and arrange your child Traffic nodes inside this custom segment at the entry and exit points of the intersection.
Open the Path settings tab and change Additional Settings to
AutoCrossroad.Press Clear to wipe any existing paths, then click Create to automatically calculate crossroad geometry and build all traffic paths.
Option C: Intersection Creation Mode (From Existing Scene Roads)
Note
You do not need to manually add or create new Traffic Nodes for this method. The creator will automatically generate internal nodes based on your scene selection.
Open the Path settings tab and set Additional Settings to
IntersectionCreation.In the Scene View, select two or more existing TrafficNodes belonging to different independent roads already placed on your scene.
Configure the merging behavior in the inspector:
Auto Merge Nodes: Terminal nodes of your straight roads will automatically align and link for a seamless mesh transition.
Auto Generate Crossing: Automatically triggers path solving between the chosen roads.
Click the Create button. The component will automatically match the node count, clone all settings from the selected scene nodes, align crosswalks, and build the intersection paths.
Complete all the default steps.
Note
You can convert any default template to Custom Segment in the Other settings tab.
Settings
New Node Settings
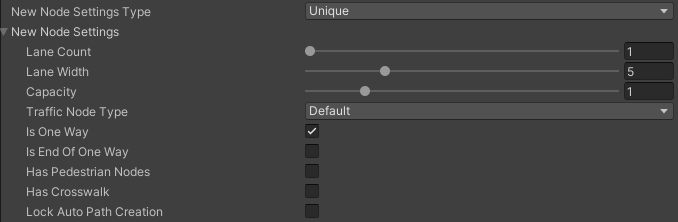
- New node settings type [custom settings enabled] new TrafficNode will be created like:
Prefab : new prefab.
Unique : created with unique defined settings.
Copy last : will be created with the settings of the last created node.
- Copy selectedwill be created with the settings of the selected node.
Copy node index
Custom Path Settings
Additional Settings
Extrude Lane
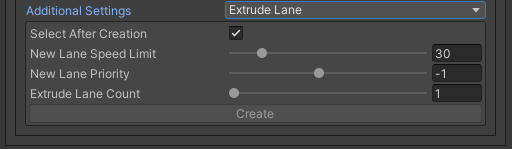
How to use:
Drag the green sphere from where you want the new lane to start.
Drop the cursor where you want the lane to end.
Adjust the position handle of the new path.
Press E key or press Create button in the inspector to create new lane.
Example.
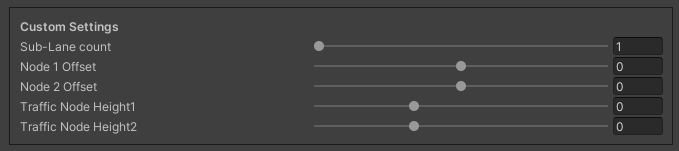
Custom Settings

Snap Node Settings
Info.
Custom TrafficNode Editor Window
Window that you can configure each TrafficNode settings. Custom settings should be enabled.
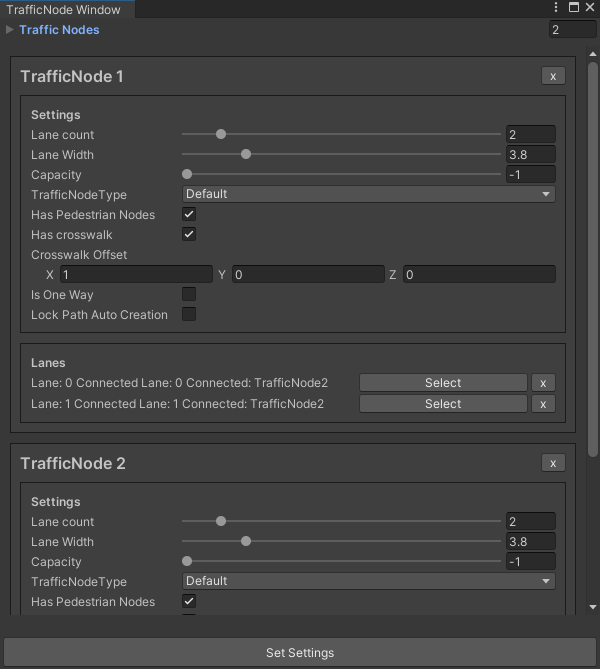
Examples
Example.
Settings Description
Snap Node Settings
- Snap object type:
All : snap TrafficNode & Path node.
Traffic node : only TrafficNode.
Path node : only Path node.
- Auto-snap position on/off position snapping.
Add half offset : the snapped object is shifted by half of the set snapping size.
- Auto round rotation:on/off rotation snapping.
Round angle : snapping angle value.
Roundabout
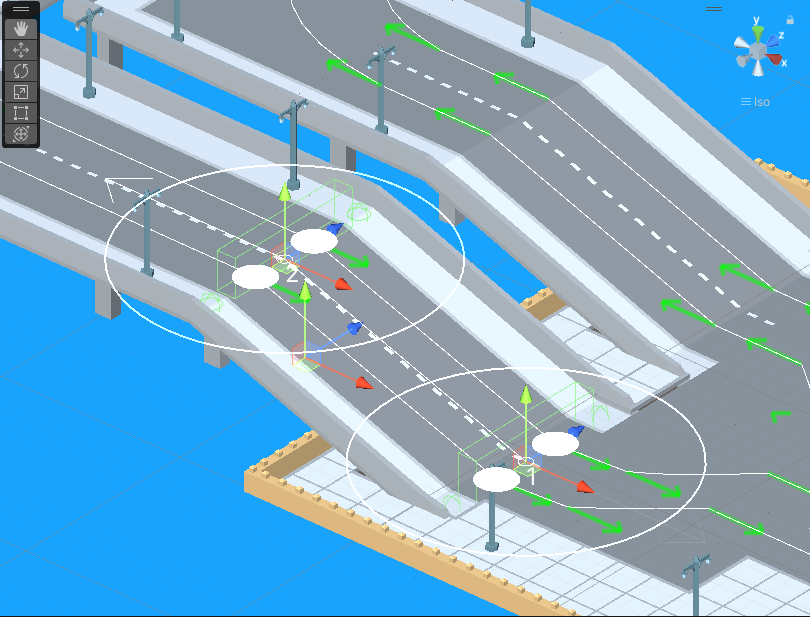
The Roundabout component works in tandem with the RoadSegmentCreator to automatically generate complex circular intersections. The tool supports two primary workflows: creating a standard roundabout from scratch using purely inspector-defined metrics, or generating a custom roundabout fitted directly onto the existing traffic nodes of approaching roads.
Method 1. Inspector Only Mode
This method is ideal for creating a standalone roundabout “from scratch” in an empty area of the scene, where you manually define the dimensions and the number of connection points.
Create a RoadSegment.
In the RoadSegmentCreator component, select Roundabout as the road segment type (the Roundabout script component will be attached automatically).
In the Current Generation Type dropdown, select
InspectorOnly.Configure the base parameters of the roundabout in the Inspector:
Entrance Node Count: The number of entry/exit roads connecting to the roundabout (ranges from 3 to 10).
Outer Radius: The distance from the center to the entrance/exit nodes.
Inner Radius: The radius of the inner central island.
Inner Lane Count & Lane Width: The number and width of the lanes inside the circle.
Press the Create button to generate the road layout.
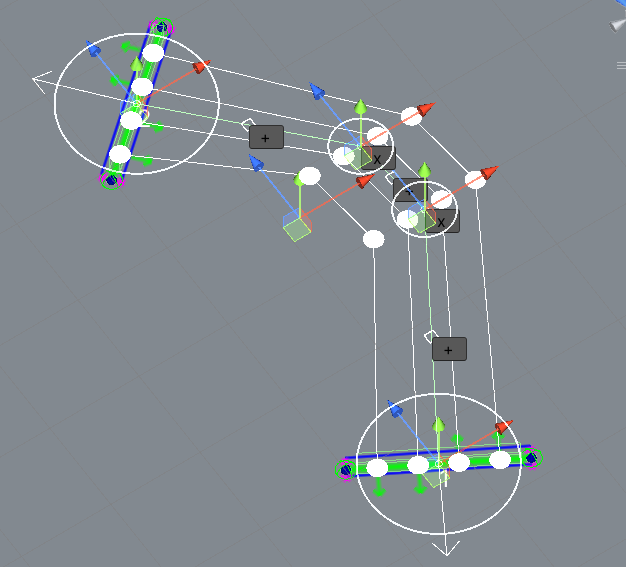
If you need to fine-tune the layout, you can manually move elements directly in the Scene View using Gizmos handles by selecting the appropriate Active Handle mode.
Method 2. Custom Mode (Based on Existing Roads)
This method allows you to seamlessly integrate a roundabout into your current road network. Instead of creating a standalone asset and trying to snap it manually, the tool uses the final Traffic Nodes of the straight roads that approach the intersection as anchor points.
Create a RoadSegment and set its road segment type to Roundabout via the RoadSegmentCreator.
Set the Current Generation Type parameter to
Customin the Roundabout component.Enable the Show Buttons option in the editor to display node selection overlay elements in the Scene View.
Look at the Scene View: each available traffic node will have a “T” button floating above it. Simply click the “T” button on the final nodes of the approaching roads to automatically add them to the selection (the button label changes to “T-” once selected, allowing you to remove the node just as easily).
Choose how the center of the circle should be defined via the Center Type option:
Current: The current transform position of the Roundabout object is used as the center.Calculate: The system automatically calculates the geometric intersection center based on the perpendiculars and directions of the approaching roads.
Enable the Calculate Radius option to let the system automatically compute the ideal inner and outer circle radii based on the distance to the closest selected node.
Enable the Merge Nodes option. This ensures that the newly generated roundabout entry and exit paths will automatically snap and stitch onto your pre-existing traffic nodes.
Press the Create button. The system will automatically sort the nodes clockwise to prevent any path overlaps or intersection conflicts, and seamlessly link the approaching streets into the loop.
Advanced Geometry & Customization
Once a roundabout is generated (especially useful for tweaking the layout in Custom mode), you can utilize advanced parameters to deform and fine-tune its geometry:
Position Fine-Tuning: Adjust the
Additive Circular PositionandAdditive Offsetparameters for individual entry points to slide them along the circle’s perimeter or shift their precise distance from the center.Roundabout Types:
SingleInnerNode: Generates one inner node per circle segment.DoubleInnerNodes: Generates two inner nodes per segment, providing a smoother and more natural curvature for vehicle paths.
Pedestrian Ring Settings: By enabling the
Generate Outer Pedestrian Ringoption, the tool automatically constructs a continuous sidewalk loop around the outer radius, linking existing crosswalks together into a unified pedestrian network.
Components
General settings
Custom settings
Light settings
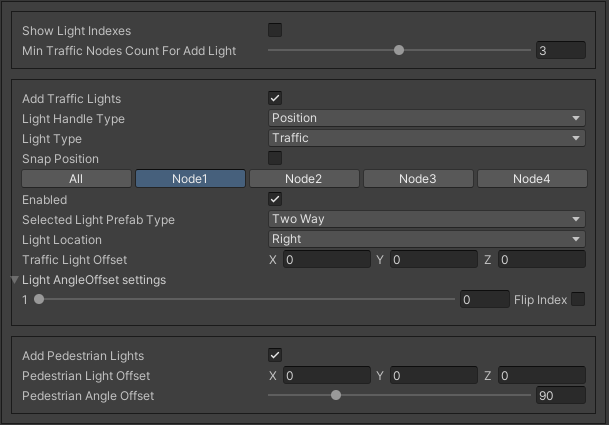
How To Use
Turn on traffic light option.
Select Light prefab type.
Set the traffic light offset or enable Light handle type.
If you want to configure the traffic lights individually, select the Node button with the appropriate index.
Traffic lights
- Light handle type:
None
Position : enable position handle for traffic lights.
Rotation : enable rotation handle for traffic lights.
- Selected light prefab typeprefab of the traffic light to be added [can be changed in creator settings].
Oneway
Two way
Four way
- Light location :
Right : will be added to the right of the traffic nodes.
Left : will be added to the left of the traffic nodes.
Right left : will be added on both sides of the traffic node.
- Light angle offset settings:
Angle offset : local rotation angle of the traffic light.
Flip index : switches to the opposite light index in the traffic light.
Pedestrian lights
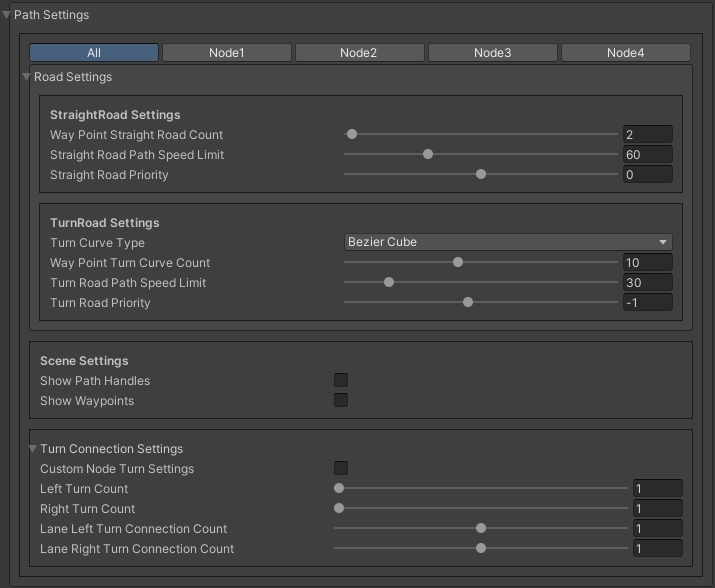
Path settings
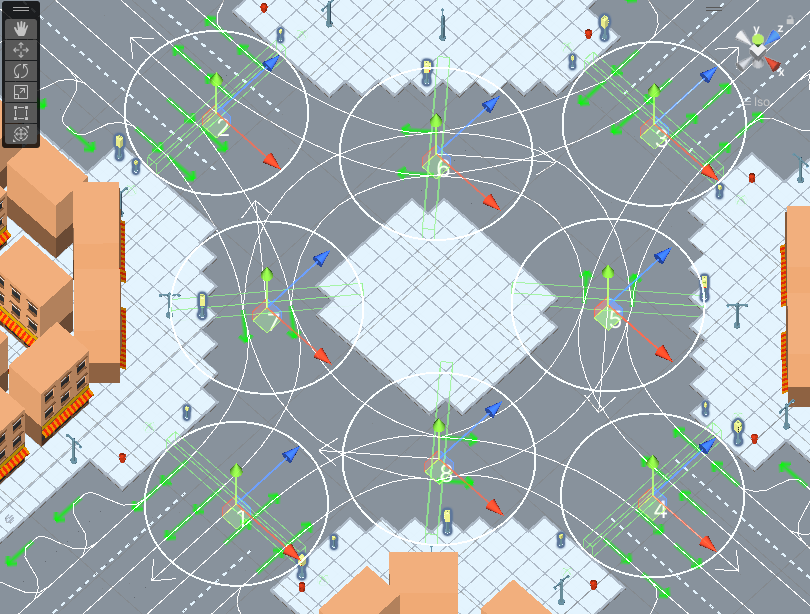
Node selection panel
- How to customize path:
Select TrafficNode on the inspector panel.
Select desired path on the inspector panel (it will be highlighted in the scene).
Adjust the position of the path nodes (make sure path handles is enabled).
Press Open Path Settings button to customize Path settings window.
Road settings
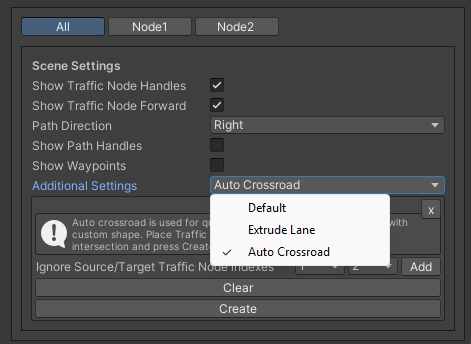
Scene settings
- Show path handleson/off position handles in the scene.
Show edit buttons path nodes : on/off add & remove buttons nodes in the scene.
- Show waypointson/off visual circle position of the waypoint in the scene.
Show waypoints info : on/off info of waypoints (local index, speedlimit).
Turn connection settings
Segment handler settings
Other settings
Hotkeys
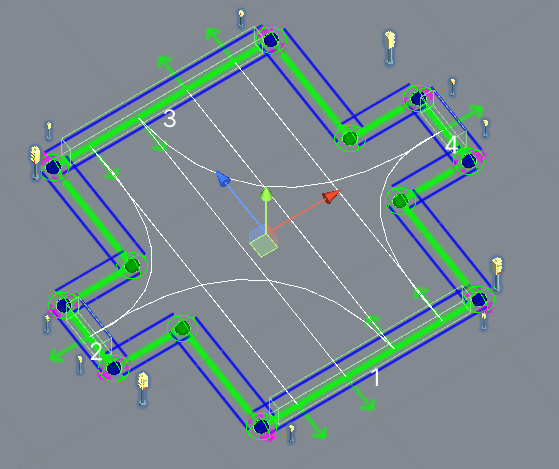
Auto Crossroad
For automatic generation of custom crossroads, use this feature.
How To Use
Create a Custom road segment.
Open the Path Settings tab & enable the Auto-Crossroads option in the Additional Settings dialog.
Press the Clear button to delete existing paths.
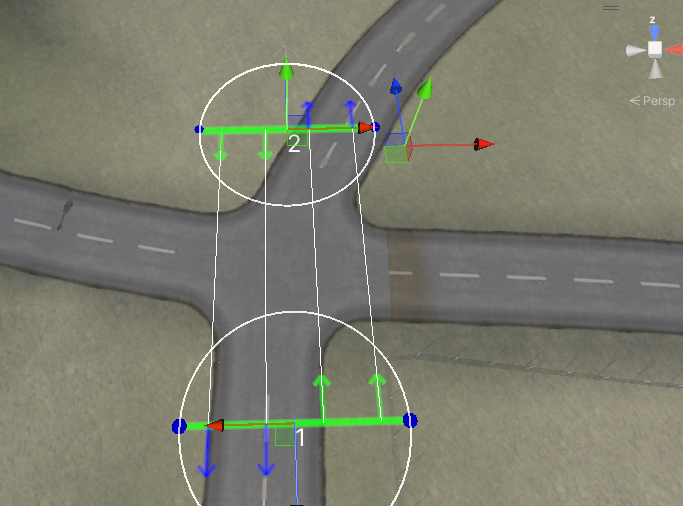
Place Traffic nodes at the entrances/exits of the intersection.
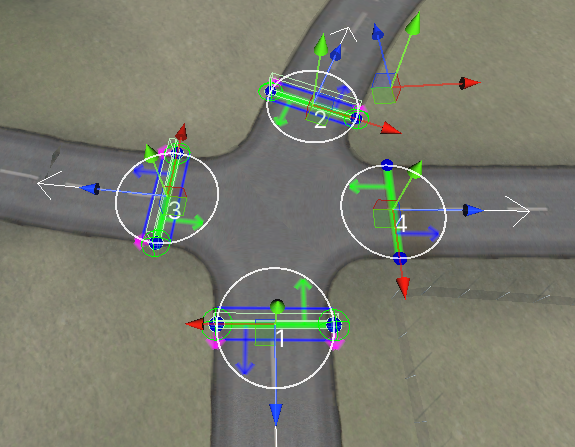
Press the Create button.
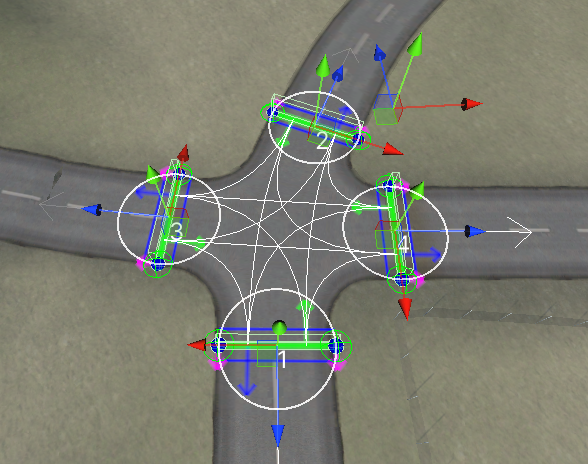
If you want to avoid connection for certain Traffic nodes select indexes according to scene indexes & press Add button, then press Create button again.
- For example 1-3 & 3-1 nodes.

1-3 & 3-1 nodes no longer connected.
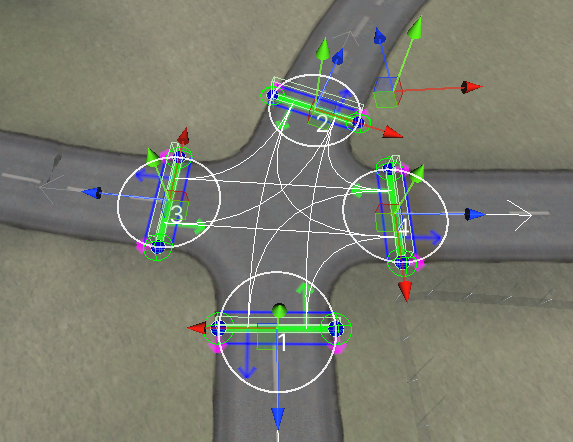
Example result.
If you are missing a connection, use the Path Creator to add missing paths.
Dead End
Destroy
If you want traffic to be destroyed at the dead end (e.g. when it drives beyond the scene), enable the Destroy vehicle type in the Traffic node.
U Turn
To create u turn path:
Open Path Creator tool.
Select desired Traffic node for u turn.
Enable U turn option in the Node settings tab.
Enable Connect same side option & set Source node side to External side.
Press Create button.